Deployment
The boilerplate comes pre-configured for Heroku deployment, making it easy to get your application running in production. Heroku was chosen as the primary deployment platform due to its excellent Django support, simplified deployment process, and strong security features.
While not free, Heroku offers an affordable Eco tier starting at $5/month that's suitable for most small to medium applications. For students, Heroku services are available at no cost through the GitHub Student Developer Pack.
Project Configuration for Heroku Deployment
Procfile configuration
The Procfile is a crucial file that tells Heroku how to run your application. It must be named exactly Procfile (with a capital 'P' and no file extension).
# Procfile
web: gunicorn [project_name].wsgi:application --log-file -

web: gunicorn saas.wsgi:application --log-file -
This line means:
web:- Declares this as a web processgunicorn- The production-grade WSGI HTTP Server[project_name].wsgi:application- Path to your WSGI application--log-file -- Logs output to stdout for Heroku's logging system
Replace [project_name] with your Django project's name based on your project structure:
saas/
├── [project_name]/     # 👈 Use this directory name
│   ├── __init__.py
│   ├── settings.py
│   ├── urls.py
│   └── wsgi.py        # 👈 This file must exist
├── manage.py
├── Procfile
└── requirements.txt
Runtime.txt Configuration
The runtime.txt file specifies the exact Python version for your application. This ensures consistency between development and production environments.
# Terminal

python --version
First verify your local Python version, then update runtime.txt file to match a supported Heroku Python version. The version must be specified in the exact format (python-X.Y.Z)
Requirements.txt Setup
The requirements.txt file is crucial for your deployment as it lists all Python packages and their specific versions required to run your application. This ensures that Heroku installs exactly the same dependencies you're using in development.
To generate or update this file with your current project dependencies:
# Terminal

pip freeze > requirements.txt
- Run this command within your project's virtual environment
- Update this file whenever you add or update project dependencies
- Review the generated file to ensure only necessary packages are included
Git Repository
Heroku supports multiple deployment methods: GitHub integration, Git CLI, and container registry. For this guide, we'll use GitHub deployment - a straightforward approach that connects your GitHub repository to Heroku, enabling automatic deploys when you push changes. You'll need a GitHub account and your code hosted on GitHub to proceed.
Initialize Git Repository
Git initialization is the first step to track your project's changes and prepare for Heroku deployment. It creates a repository that monitors all changes in your code, like a smart folder for your project.
# Navigate to your project directory
cd your-project-name

# Setup and Configuration
git config --global user.name "Your Name"
git config --global user.email "your.email@example.com"
git config --list                                    # List all configurations

# Initialize a new Git repository
git init
.gitignore file
The .gitignore file specifies which files and directories Git should ignore when tracking changes. The boilerplate comes with a pre-configured .gitignore file optimized for Django projects, so no additional setup is required.
Push to GitHub Repository
After initializing your local repository and making your first commits, you'll need to connect and push your code to GitHub. Here's how:
# Link your local repository to GitHub
git remote add origin https://github.com/username/repository-name.git

# Verify remote connection
git remote -v

# Push your code to the main branch
git push -u origin main

# For subsequent pushes, simply use
git push
Common Git Commands
Here are the essential Git commands you'll use regularly during development:
# Repository Operations
git remote -v                         # List all remote repositories and their URLs
git remote add origin <url>           # Add a new remote repository named 'origin'
git remote remove origin              # Remove the remote named 'origin'

# Check Status & History
git status                     # Show changed/staged files and branch
git log                       # View commit history
git log --oneline            # Compact history view

# Basic Operations
git add filename             # Stage specific file
git add .                    # Stage all changes
git commit -m "Message"      # Commit staged changes with description

# Branch Operations
git branch                   # List branches
git branch feature-name      # Create new branch
git checkout branch-name     # Switch branch
git checkout -b new-branch   # Create and switch to new branch
git branch -d branch-name    # Delete branch

# Remote Operations
git pull                     # Get latest changes from remote
git push                     # Send commits to remote
git push origin branch-name  # Push specific branch to remote
git push -u origin branch    # Push and set upstream branch
git fetch                    # Download changes without merging
git remote -v               # List remote connections

# Undo Changes
git restore filename         # Discard changes in working directory
git reset --soft HEAD~1      # Undo last commit, keep changes staged
git reset --hard HEAD~1      # Undo last commit and all changes (careful!)

# Remove the Git history
rm -rf .git
Git Documentation: Complete official guide for all Git commands.
GitHub Git Cheat Sheet: Single-page PDF with essential commands.
GeeksForGeeks Git Cheat Sheet: Beginner-friendly guide with step-by-step examples.
Deploy to Heroku
You can deploy your application either through Heroku's web interface (Heroku Dashboard) for a more visual experience, or using the Heroku CLI for command-line deployment. Both methods are fully supported, but this documentation will focus on the Heroku Dashboard approach. Before starting, make sure you have a Heroku account.
Deploy Your Application to Heroku
1. Creating Your First Heroku Application
- From your Heroku Dashboard, click "New" → "Create new app", enter your app name, select a region and create.

Heroku Dashboard - Create a new app
2. Establishing GitHub Connection for Deployment
- In the Deploy tab, choose GitHub as deployment method, authenticate if needed, and connect your repository.

Heroku Dashboard - Deployment method
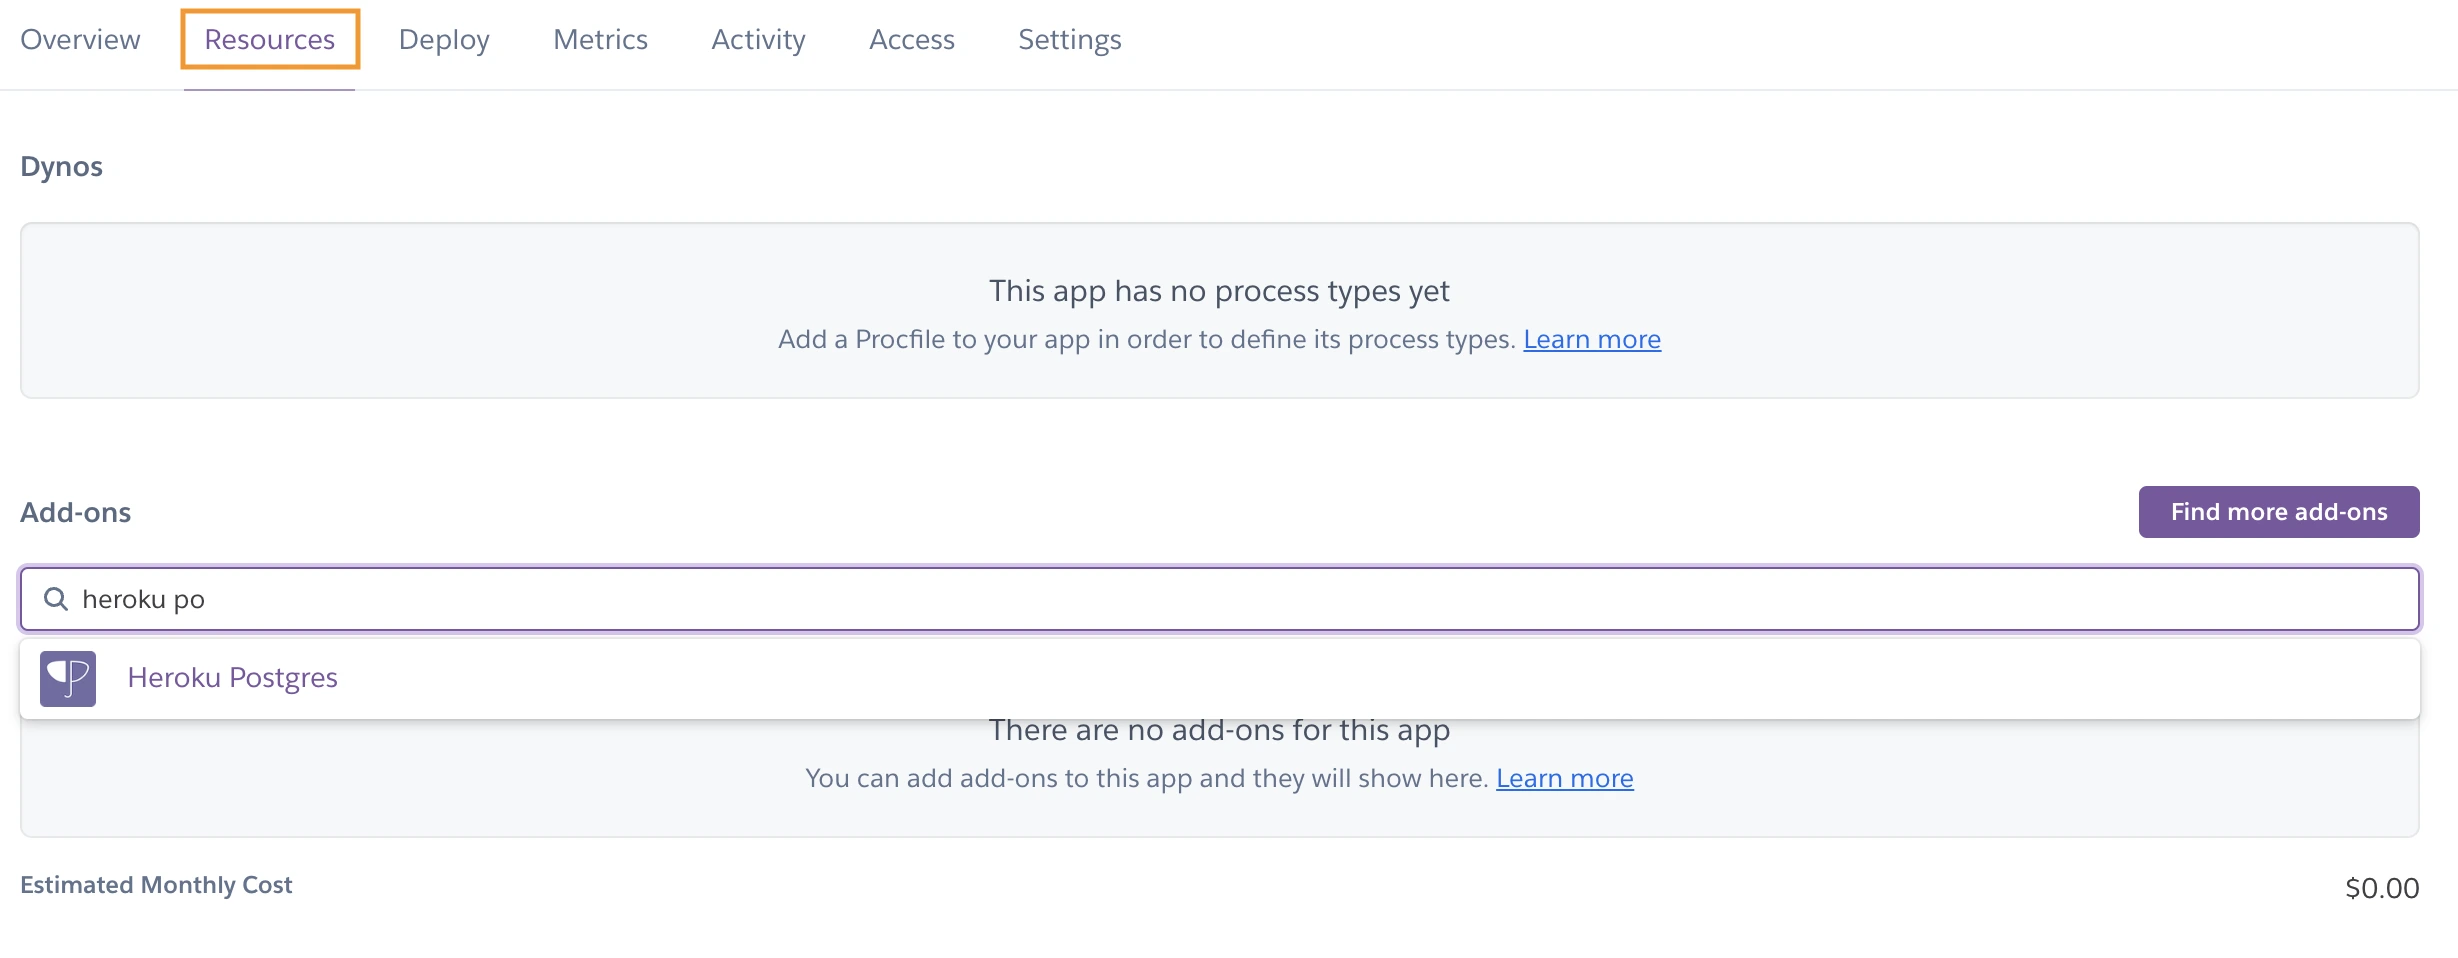
3. Setting Up Your Production Database (optional)
PostgreSQL setup through Heroku is entirely optional based on your application's needs. If you decide to use PostgreSQL, you can set it up through Heroku's add-ons:
- Under Resources tab, search and add "Heroku Postgres" addon with the Mini plan.
Heroku Dashboard - Postgres Database
Note: If you're testing your app or running a small-scale application, you can continue using SQLite3. For larger applications or those requiring more robust database capabilities, you're not limited to Heroku's PostgreSQL. You can configure your application to use other database solutions (Amazon RDS, Google Cloud, MongoDB Atlas).
To use alternative database solutions, update your DATABASE_URL in your environment variables accordingly:
DATABASE_URL=your_database_connection_string
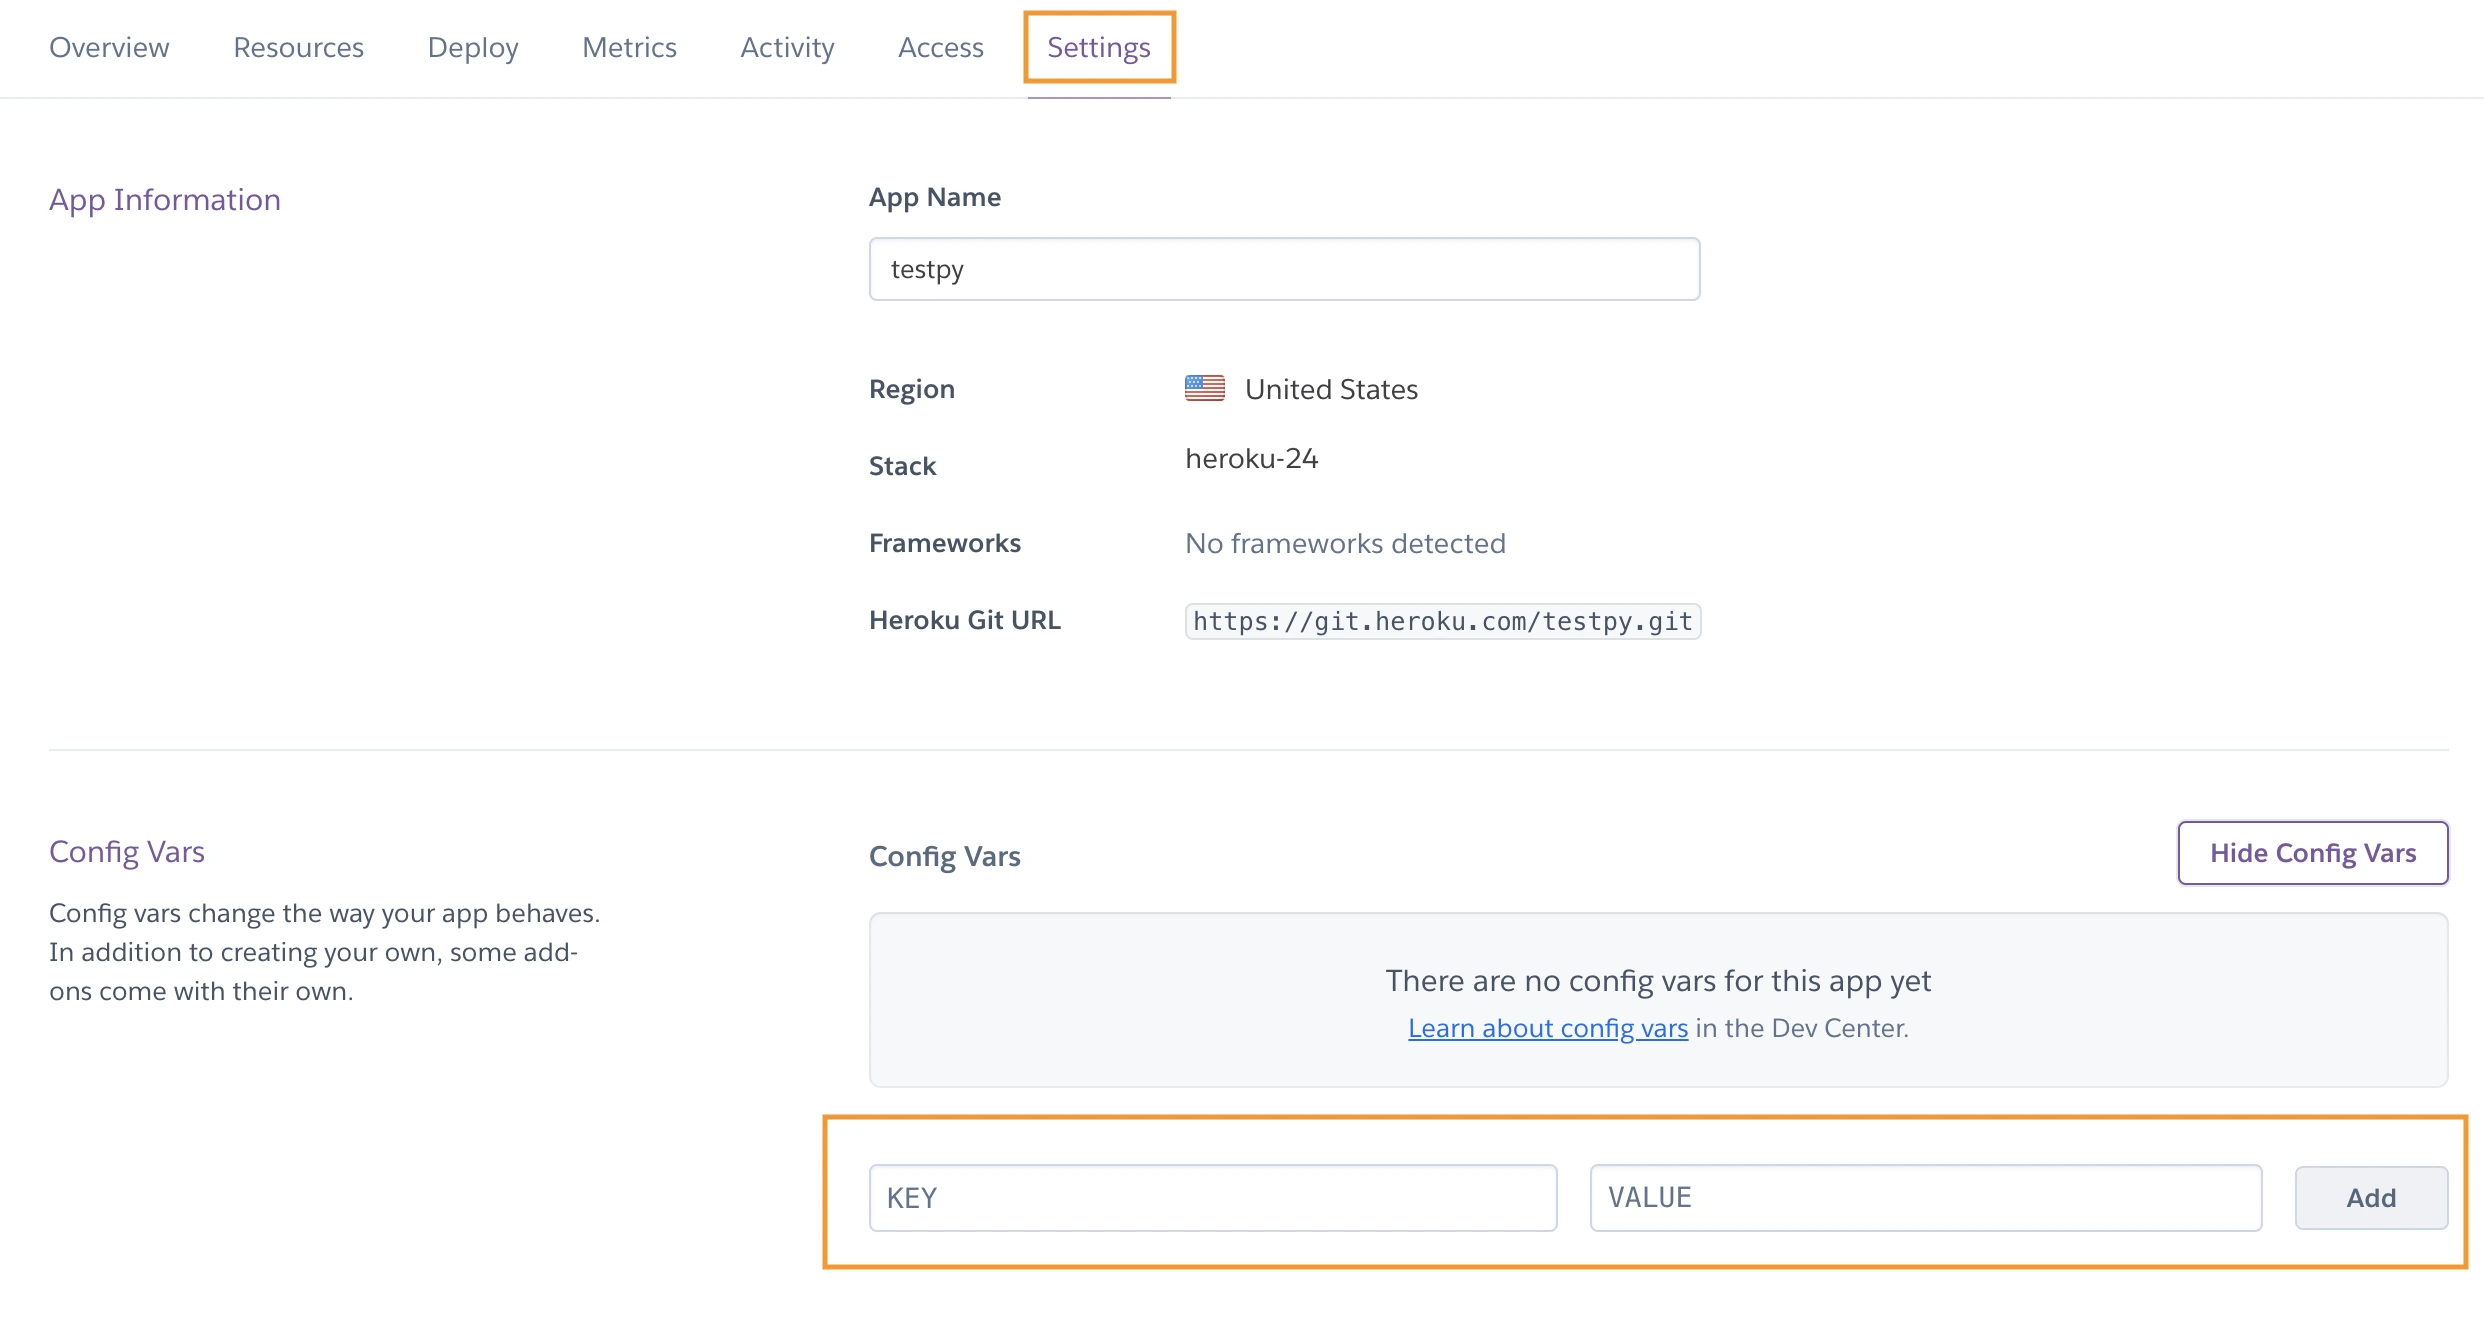
4. Configuring Environment Variables
Setting up environment variables on Heroku ensures your application has access to all necessary configuration data and API keys needed to function properly in production.
- In Settings tab, click "Reveal Config Vars" and add each variable from
.envfile
Heroku Dashboard - Environment variables setup
Missing even a single required environment variable will cause deployment to fail. Ensure to replicate entire local configuration to avoid deployment issues.
5. Launching Your First Deployment
- In Deploy tab, scroll to Manual deploy, select main branch and click "Deploy Branch".

Heroku Dashboard - Deploy
6. Initializing Your Application
Before your application can run properly on Heroku, you need to perform initial setup tasks like creating database tables, collecting static files, and creating a superuser. These steps ensure your application starts with the correct database structure and administrative access.
- Open console through "More" button and run console:
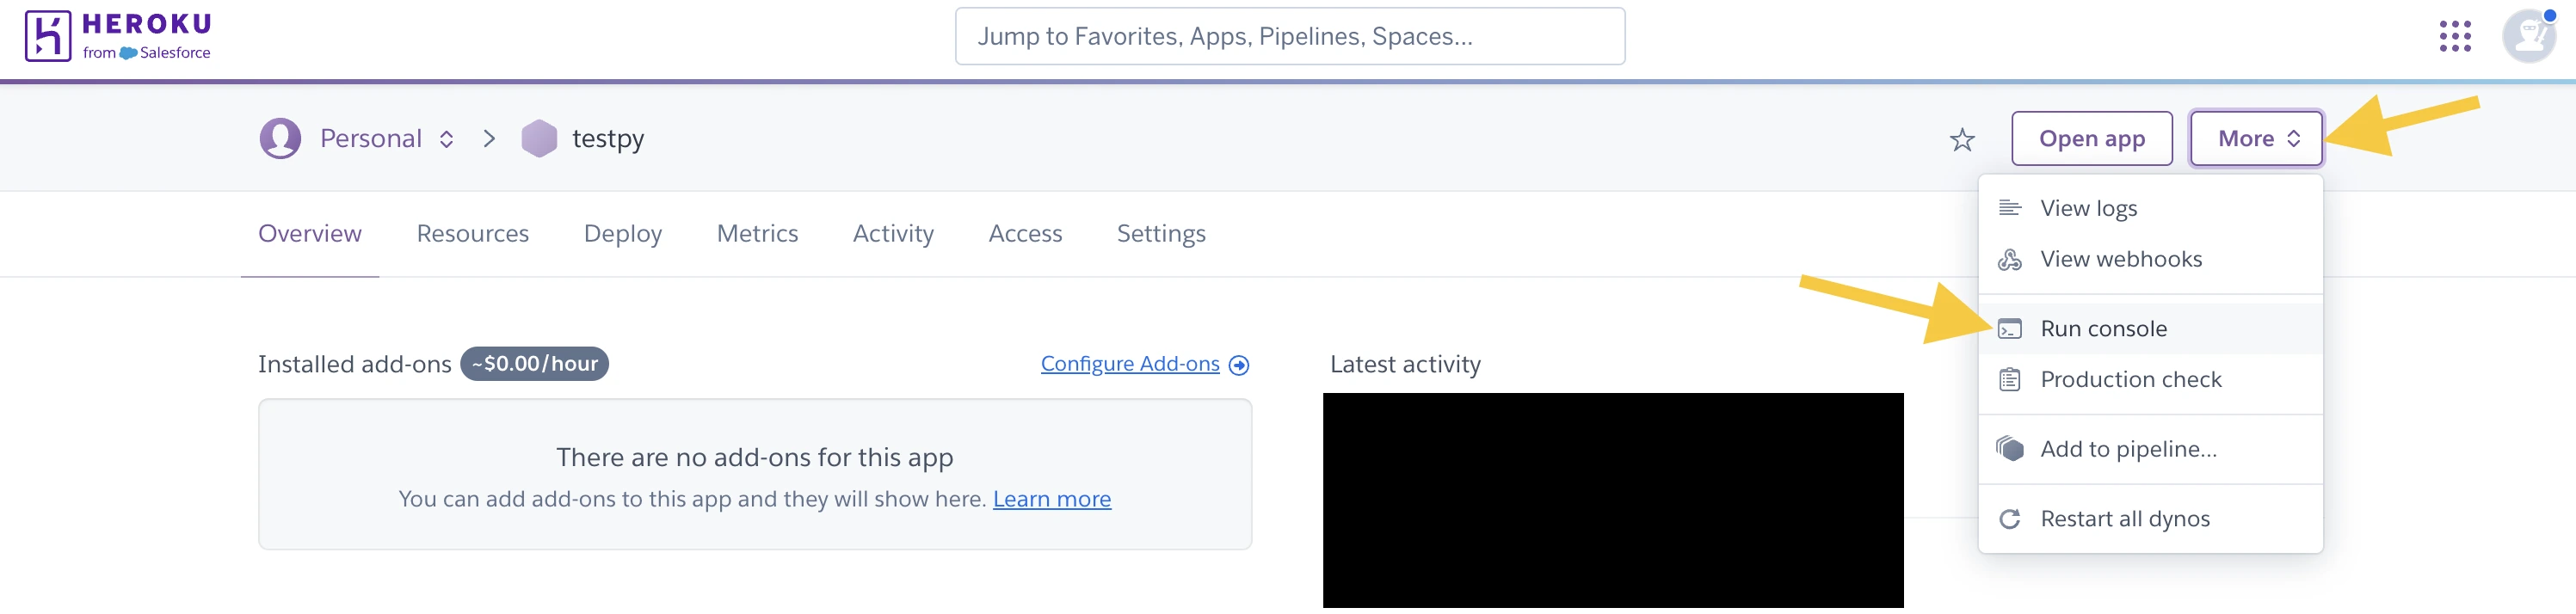
Heroku Dashboard - Run console
- Run these commands:
# Create database tables
heroku run python manage.py migrate

# Collect static files
heroku run python manage.py collectstatic --no-input

# Create a superuser (admin account)
heroku run python manage.py createsuperuser
Debuggin using Heroku Log Streaming
Heroku logs provide real-time visibility into your application's behavior, making them essential for monitoring, debugging, and maintaining your application. They capture everything from HTTP requests to application errors, helping you understand what's happening in your deployed application.
1. Authenticate to Heroku CLI
# Login to Heroku CLI
heroku login

# Check login status
heroku auth:whoami
2. Access logs
# Stream logs in real-time
heroku logs --tail --app your-app-name

# View recent logs
heroku logs --app your-app-name

# Filter INFO logs
heroku logs --tail --app your-app-name | grep INFO

# Filter WARNING logs
heroku logs --tail --app your-app-name | grep WARNING

# Filter ERROR logs
heroku logs --tail --app your-app-name | grep ERROR

# Filter CRITICAL logs
heroku logs --tail --app your-app-name | grep CRITICAL
Heroku Logging : Complete guide to viewing and managing logs on Heroku
Log Runtime Metrics: Monitor dyno performance metrics
Papertrail: Searchable log management and analysis
Django Logging: Configure Django logging for Heroku
Domain Name
A domain name is your website's address on the internet (e.g., www.yourapp.com), providing a professional and memorable way for users to access your application.
Get a Domain Name
Purchase your domain name from a domain registrar such as Namecheap, GoDaddy, SquareSpace or Cloudflare.
Configure Domain on Heroku
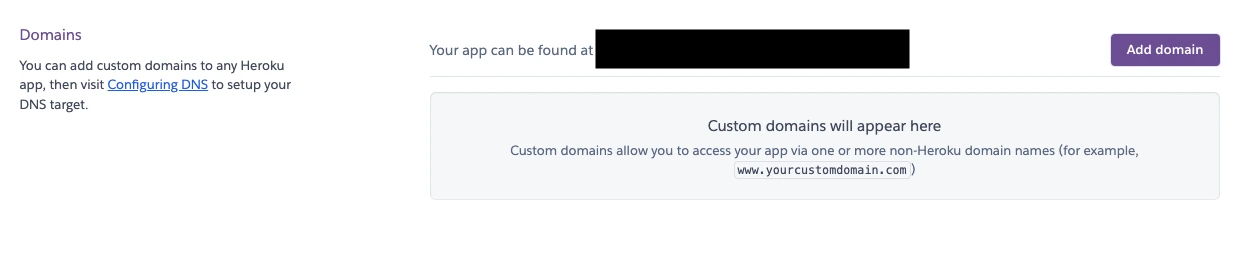
1. Add domain name to Heroku app
- Go to Settings tab in Heroku Dashboard and add your domain in the "Domains" section
Heroku Dashboard - Add domain name
2. Get Heroku DNS target
- After adding your domain, Heroku provides a DNS target that will be needed for DNS configuration at your domain registrar
Configure DNS Records
At your domain registrar (Namecheap, Godaddy,..), set up these DNS records:
Type: CNAME
Name: www
Value: [Your Heroku DNS target]Note: For root domain (yourapp.com), configuration varies by provider. Some use ALIAS or ANAME records, while others support CNAME flattening. Check your provider's documentation for specific instructions.
Custom Domains: Complete guide for adding and configuring custom domains on Heroku
Cloudflare: Configure CNAME and set up HTTPS with Heroku
Namecheap: Set up ALIAS records for root domain
GoDaddy: Configure CNAME and forwarding for domain setup
SSL Configuration
Heroku provides SSL certificate management through two options: Automatic Certificate Management (ACM) which handles SSL automatically once enabled, or Manual SSL where you can upload your own certificate for custom requirements.
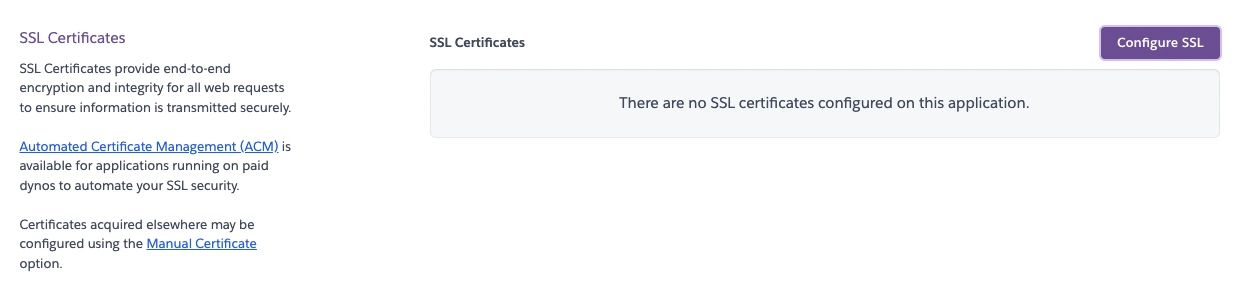
Heroku Dashboard - Settings - Configure SSL
SSL Certificates : Learn about Heroku's automatic SSL certificate management